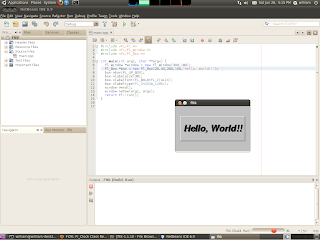
 This blog post shows you how to get the FLTK Fast Light Toolkit up and running on Ubuntu using Netbeans 6.9 IDE.
As a disclaimer I am much more of a software engineer than a system administrator. If I did anything that is less than optimal feel free to let me know. Yet I could not find any instructions on the internet that showed how to setup FLTK on Ubuntu with Netbeans so I wrote them up.
Download FLTK
- http://www.fltk.org/
- Extract fltk-1.1.10 to your home directory
- sudo apt-get install libx11-dev libxpm-dev x11proto-xext-dev libxext-dev g++
- cd to /home/fltk-1.1.10
- sudo ./configure
- sudo make
- sudo make install

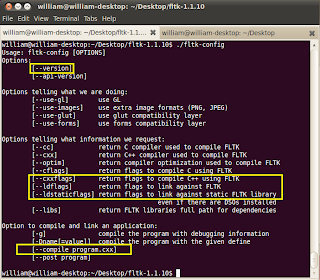
FLTK comes with a script called "fltk-config" this script has many helpful options. If you want to simply test your FLTK installation you can use this script to compile your FLTK application by typing: "fltk-config --compile myTest.cpp" You will also need to use the "--cxxflags", "--ldflags", and "--ldstaticflags" to figure out how to setup Netbeans.
"--cxxflag"
My output was as follows:
"-I. -I./png -I./zlib -I./jpeg"
This means that FLTK relies on header files contained in:
- fltk-1.1.10
- fltk-1.1.10/png
- fltk-1.1.10/zlib
- fltk-1.1.10/jpeg
"--ldflags"
My output was as follows:
"-L./lib -lfltk -ldl -lm -lXext -lX11"
This means we must set the linker to point to the /lib directory within fltk-1.1.10.
"--ldstaticflags"
My output was as follows:
"./lib/libfltk.a -ldl -lm -lXext -lX11"
Configure Netbeans 6.9
Step 1 - Configure C++ Settings
- Right Click on Project and Click Properties
- Click "C++ Compiler"
- Click "Include Directories"
- Add the Directories shown in image above
Step 2 - Configure Linker

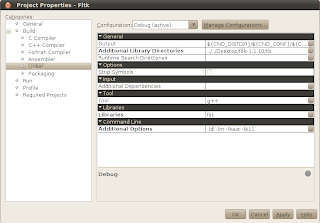
- Right Click on Project and Click Properties
- Click "Linker"
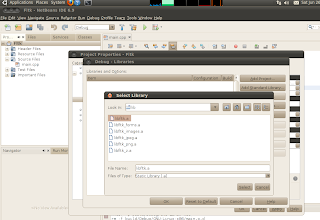
- Click "Libraries"
- Click "Add Library"
- Add "libfltk.a"

- Click Additional Options
- Add "-ldl -lm -lXext -lX11"
Step 3 - Configure Output Window
If everything worked alright you should be able to build and run FLTK applications! Visit http://www.fltk.org/doc-1.1/basics.html#basics for some sample code!

